Introduction
ProjectX provides a convenient way for the founders of web sites in related fields to post ads on each other's sites, without any money changing hands.
Ads
ProjectX allows you to enter information about each of your web sites, and then upload one or more ads for each site. Currently ads in the standard 125 x 125 format are supported in any web-compatible image format (PNG, JPG, or GIF. including animated GIF).
Associates
You can specify the ProjectX users that you want to exchange ads with, and these users are listed on the Associates tab.
Spots
Locations on your site where you want to place ads are referred to as Spots. You can define any number of spots for each site. For example, you could have one spot on the home page, called Home, and one on all the content pages, called General.
Each spot can be assigned from 1 to 3 ads, which will be shown in rotation. You can select the ads to show in each spot from any of the ads offered by you or your friends.
For each spot ProjectX shows you the code you need to cut and paste into your web site. The code uses the widely-supported iframe tag, and does not require JavaScript to be enabled on the user's browser.
Statistics
ProjectX records show and click-through statistics for each of the ads shown at each spot. Both the owner of the ad, and the owner of the spot showing the ad, can display these statistics by clicking on the ad.
Adding sites
The first step in using ProjectX is to add information about the sites you manage.
Once you have added a site you can make ads available to advertise it on other sites, and you offer advertising space on it for other peoples sites.
To add a site
- Click the Sites tab.
- Click the New Site button.
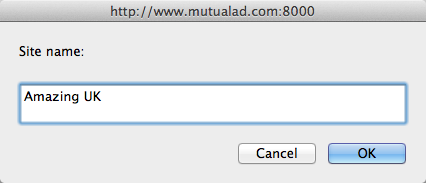
- Enter a name to identify the site, and click the OK button:
- On the Settings tab for the site enter the URL:
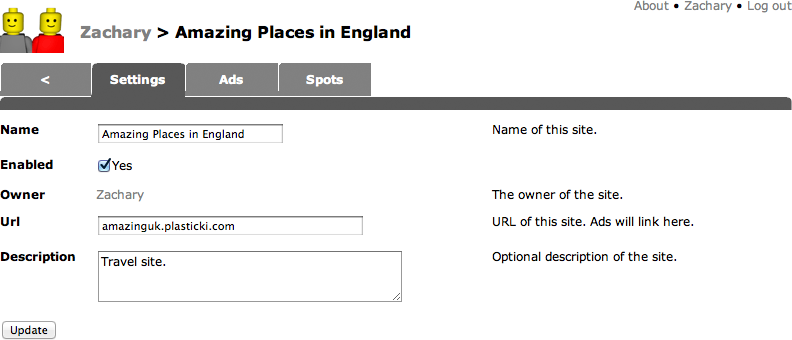
- Optionally enter a description of the site.
- Click the Update button.
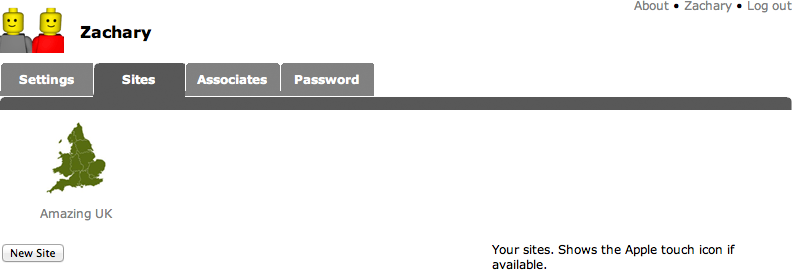
- Click the < tab to go back to the Sites tab.
An icon will be shown for the site. If the site you added publishes an Apple Touch icon it will be used for the site's icon in ProjectX:
Defining associates
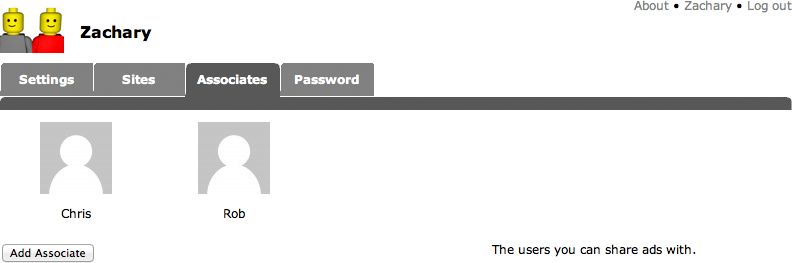
The Associates tab defines the other ProjectX users you want to exchange ads with.
To add an associate
- Click the Associates tab.
- Click the Add Associate button.
- Enter the email address of the user you want to add.
An icon for the user will be added to your Associates tab. If the user has defined a Gravatar icon, it will be shown here in place of a generic icon.
Defining ads
For each site you want to advertise you need to define one or more ads.
Currently ProjectX supports the standard ad format of 125 x 125 pixels. You should first design the ads you want to use in a suitable bitmap program, such as Photoshop or Fireworks.
To define an ad
- Click the site you want to work with in the Sites tab.
- Click the Ads tab.
- Click the New Ad button.
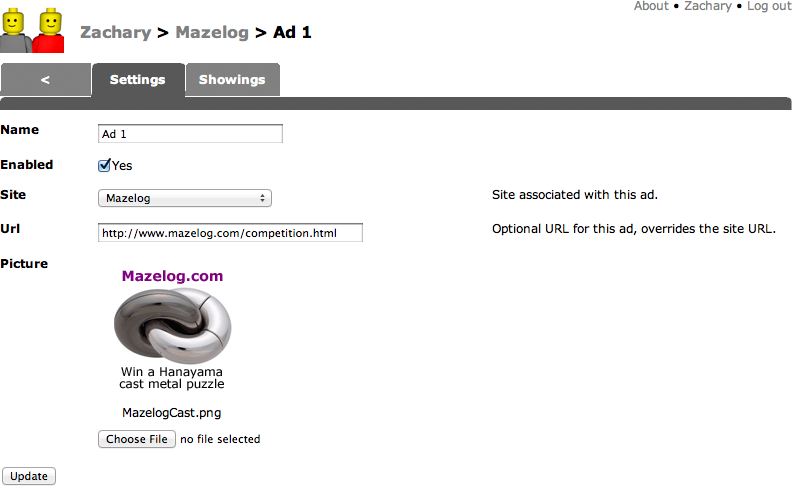
A new ad called Ad 1 is created, and the Settings tab lets you upload a graphic for the ad.
- Click the Choose File button and select the graphic file for the ad.
- If the ad should link to a specific page on your site enter the address in the Url field.
- Click the Update button.
The ad will be shown on the Settings tab:
Defining spots
For each site on which you want to place ads you need to define one or more ad locations, referred to as Spots.
A spot can show a single ad, or it can show up to three different ads, selected in rotation.
To define a spot
- Click the site you want to work with in the Sites tab.
- Click the Spots tab.
- Click the New Spot button.
A new spot called Spot 1 is created, and the Settings tab lets you choose which ad or ads to show on the spots.
- Select an ad from the pop-up menu below the first spot state to choose what ad to show there.
The pop-up menu will list all your ads, plus the ads from anyone you have listed as your associates.
- Click the Update button.
The ad will be shown on the Settings tab:
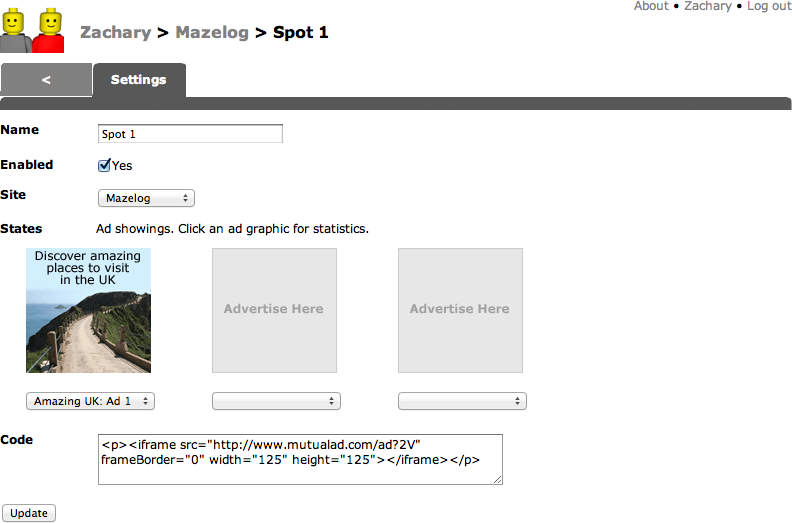
In a similar way you can up to two more ads to the spot.
To publish the ad
- Cut and paste the code in the Code box.
- Insert it on your site to automatically publish the ad or ads.
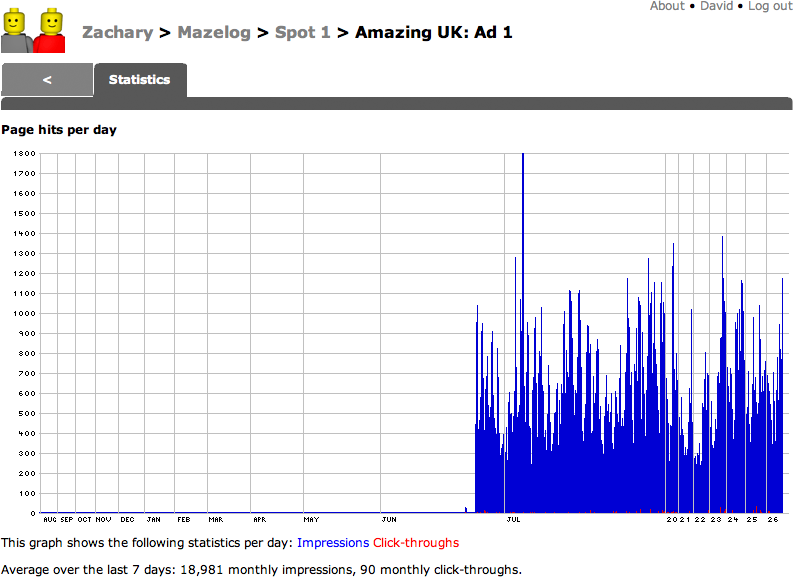
Displaying statistics
You can display statistics for your ads and spots. In each case the statistics show:
Impressions - the number of times that the ad was displayed.
Click-throughs - the number of times that it was clicked on.
To display statistics for an ad
- Click the Ads tab for the site you are interested in.
- Click the appropriate ad icon.
- Click the Showings tab.
This shows an icon for each site that the ad is currently being displayed on.
- Click the showing you want to show statistics for.
The statistics page will be displayed:
To display statistics for a spot
- Click the Spots tab for the site you are interested in.
- Click the appropriate spot icon.
- Click the ad graphic that you want to display statistics for.
If you have multiple ads being displayed on a spot, the Impressions figure should be almost identical for all the ads, but the click-throughs will depend on the popularity of each ad.