ATmega4809 boards
The Arduino Nano Every and ATmega4809 Curiosity Nano are based on the Microchip ATmega4809, which is a slight upgrade to the popular ATmega328P used in the Arduino Uno.
It runs with a 20 MHz internal oscillator, and so is a bit faster than the ATmega328P, and provides a more generous 48 Kbytes of flash memory and 6 Kbytes of RAM. Unfortunately the ATmega4809 only provides 256 bytes of EEPROM, compared to the ATmega328P's 2 Kbytes, so save-image will only be usable for very short programs.
You should install the AVR-Nano version of uLisp, which excludes the documentation and array features which would otherwise prevent it from fitting within the program memory on the ATmega4809.
Boards
Arduino Nano Every
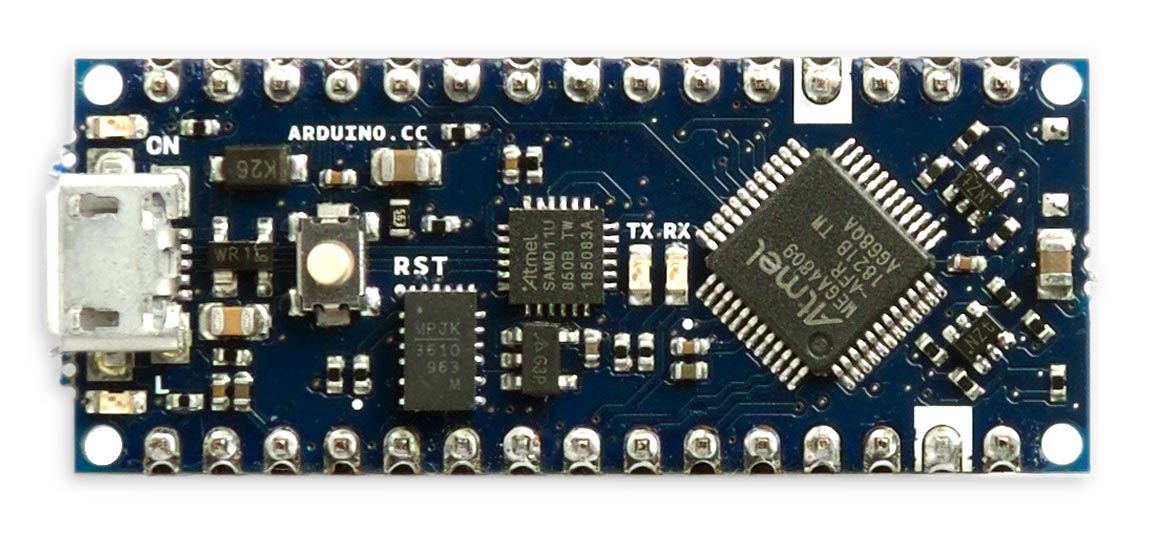
The Arduino Nano Every [1] is a low-cost board based on the ATmega4809. It's available with or without headers.
I didn't originally recommend the Arduino Nano Every for uLisp because there were issues with its serial interface support, but the latest Arduino megaAVR Boards core seems to have fixed the issues, so I can now recommend it.
LED
The Arduino Nano Every has a yellow LED connected to pin 13 which you can flash with the following program:
(defun blink (&optional x)
  (pinmode :led-builtin :output)
  (digitalwrite :led-builtin x)
  (delay 1000)
  (blink (not x)))
Run it by typing:
(blink)
Exit from the program by entering ~.
Analogue inputs
The Arduino Nano Every has eight analogue inputs which you can access on digital pins 14 (A0) to 21 (A7). They have 10-bit precision.
Analog reference
You can use analogreference to set the reference voltage for the analogue inputs:
| Keyword | Description |
| :default or :vdd | Default internal reference of 5 volts |
| :internal0v55 | Internal reference of 0.55 volts |
| :internal1v1 | Internal reference of 1.1 volts |
| :internal1v5 | Internal reference of 1.5 volts |
| :internal2v5 | Internal reference of 2.5 volts |
| :internal4v3 | Internal reference of 4.3 volts |
| :external | Voltage applied to the AREF pin (0 to 5V only) |
Analogue outputs
You can generate an analogue output using PWM on any of the digital pins 3, 5, 6, 9, or 10. The precision is 8 bits.
Playing notes
You can use the note function to play tunes on any pin. For example, the following function scale plays the scale of C on the specified pin:
(defun scale (pin)
  (mapc
   (lambda (n) (note pin n 4) (delay 500))
   '(0 2 4 5 7 9 11 12))
  (note))
For example, connect a piezo speaker between digital pin 3 and GND, and evaluate:
(scale 3)
Serial
The Arduino Nano Every has two serial ports: Serial on pin numbers 0 (RX) and 1 (TX), and Serial1 on pin numbers 24 (RX) and 25 (TX).
SPI
The Arduino Nano Every has one SPI port on pin numbers 12 (MISO), 11 (MOSI), and 13 (SCK). The clock can be between 125 kHz and 8 MHz.
I2C
The Arduino Nano Every has one I2C port on pin numbers 22 (SDA) and 23 (SCL).
ATmega4809 Curiosity Nano
Microchip's ATmega4809 Curiosity Nano evaluation board makes a very low-cost platform for running uLisp.
The ATmega4809 provides 48 Kbytes of flash memory, 6 Kbytes of RAM, and 256 bytes of EEPROM, and runs with a 20MHz internal oscillator. The board includes a debugger, providing a USB-to-serial interface:
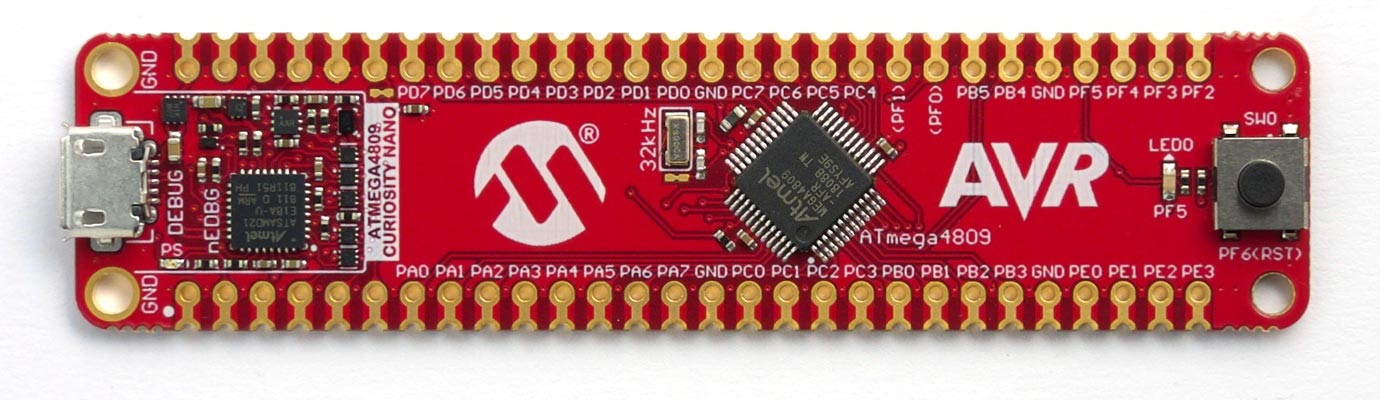
It's available from suppliers such as Farnell [2].
Installing uLisp from the Arduino IDE
- First download the latest AVR version of uLisp from the Download uLisp page.
- Install MCUdude's MegaCoreX from GitHub, as described in MegaCoreX - How to install.
- On the Board menu, under the heading MegaCoreX select Atmega4809.
- Check that the subsequent options are set as follows (ignore any other options):
Clock: "20MHz"
Pinout: "48 pin standard"
Programmer: "Atmel nEDBG (ATSAMD21E18)"
- Connect the board to the computer via USB.
- Select the device corresponding to the USB port from the Port menu.
- Upload uLisp to the board.
You should then be able to select Serial Monitor from the Tools menu, and enter Lisp commands.
LED
The Curiosity Nano has a yellow LED connected to pin 39 which you can flash with the following program:
(defun blink (&optional x)
  (pinmode 39 :output)
  (digitalwrite 39 x)
  (delay 1000)
  (blink (not x)))
Run it by typing:
(blink)
Exit from the program by entering ~.
Pin 39 can also be used as an analogue output pin, so you can pulsate the yellow LED slowly on and off with this pulse program:
(defun pulse ()
  (loop
   (dotimes (x 512)
     (delay 5)
     (analogwrite 39 (if (> x 255) (- 511 x) x)))))
Run it by typing:
(pulse)
As before, exit from the program by entering ~.
You can save the Pulse program to EEPROM by typing the command:
(save-image)
You can now load it again after a reset by typing:
(load-image)
Note that there's very little EEPROM on the ATmega4809, so this is close to the largest program you will be able to save with (save-image).
Analogue inputs
The Curiosity Nano has 16 analogue inputs which you can access on digital pins 22 (A0) to 33 (A11), and 36 (A12) to 39 (A15). They have 10-bit precision.
Analog reference
You can use analogreference to set the reference voltage for the analogue inputs:
| Keyword | Description |
| :default or :vdd | Default internal reference of 5 volts |
| :internal0v55 | Internal reference of 0.55 volts |
| :internal1v1 | Internal reference of 1.1 volts |
| :internal1v5 | Internal reference of 1.5 volts |
| :internal2v5 | Internal reference of 2.5 volts |
| :internal4v3 | Internal reference of 4.3 volts |
| :external | Voltage applied to the AREF pin (0 to 5V only) |
Analogue outputs
You can generate an analogue output using PWM on any of the digital pins 12, 14 to 19, 38, and 39. The precision is 8 bits.
Serial
The Curiosity Nano has one serial port on pin numbers 0 (RX) and 1 (TX).
SPI
The Arduino Uno has one SPI port on pin numbers 5 (MISO), 4 (MOSI), and 6 (SCK). The clock can be between 125 kHz and 8 MHz.
I2C
The Arduino Uno has one I2C port on pin numbers 2 (SDA) and 3 (SCL).
- ^ Arduino Nano Every with headers on Arduino Store.
- ^ DM320115 - Evaluation Board, Curiosity Nano, ATmega4809 on Farnell.